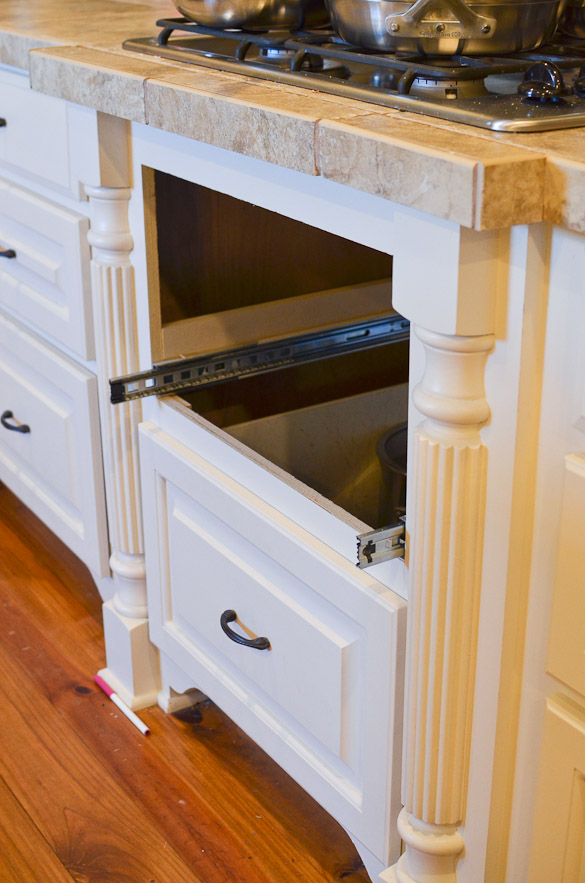
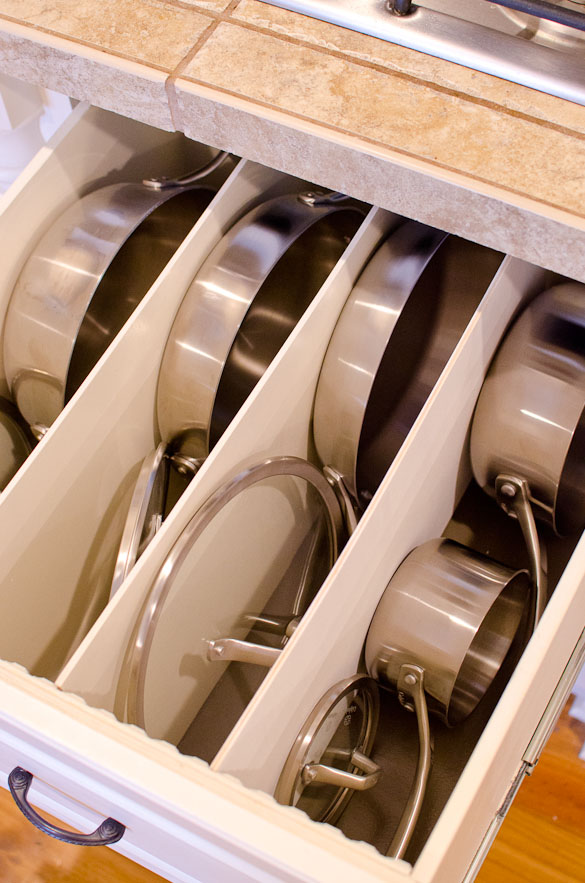
Try this DIY trick to keep your pots and pans neatly organized in your kitchen drawers. The easier it is to access your cookware, the easier it is for you to cook!
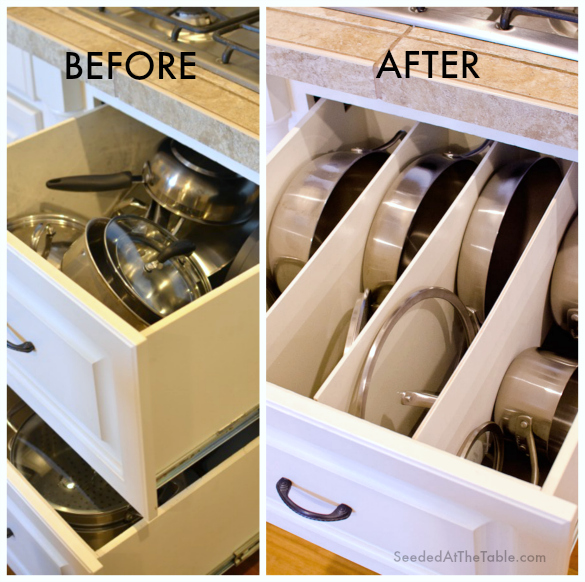
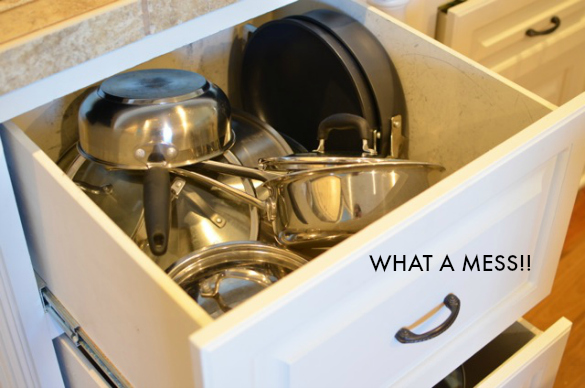
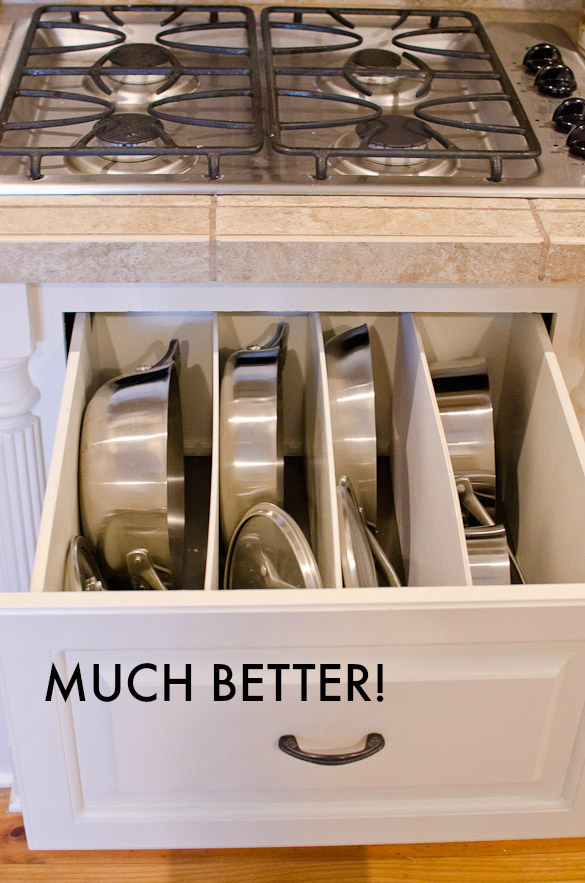
STEP 1: Remove the drawer.


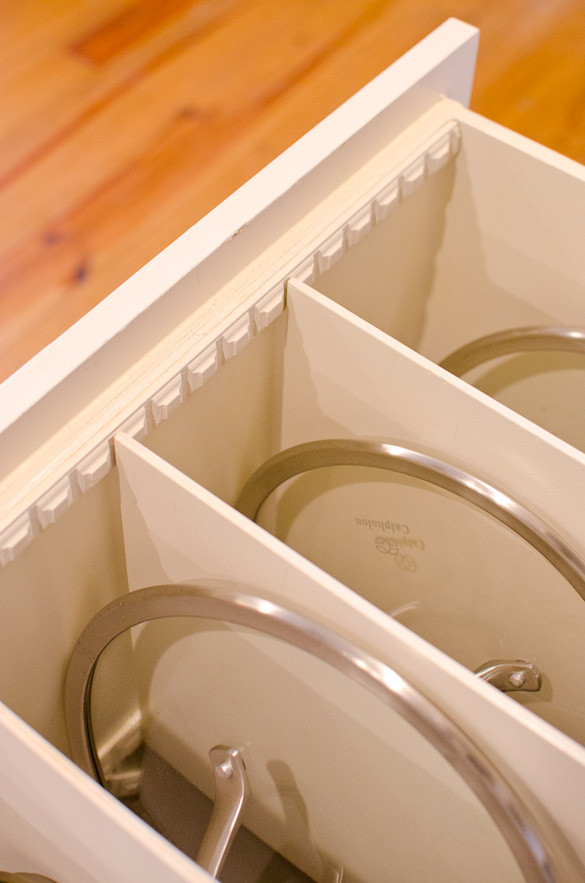
STEP 11: Replace the drawer back into the kitchen and add your pots and pans! Then, enjoy the new ease of using them!
If you have any specific questions or need some clarification on any of these steps, just leave a comment below and we'll be sure to answer! 🙂
Wondering about the collection of pots and pans I use? I love love love my new set of Calphalon AccuCore Stainless Steel cookware. Calphalon generously provided me with the pieces I knew would suit my kitchen well, however, this post is not a paid promotional post. Thank you, Calphalon!



Jose says
For folks asking about the molding, it's a style called 'dentil' molding. Various types, but all same in a repeating block pattern. Good luck!
Bambilynn says
I have searched for dentil molding all over my area and can’t find it. Can you tell me where you bought it please?
cathy anderson says
How wide is that cabinet?
I keep reading that pot drawer cabinets need to be at least 30"
All I've got to work with is a 21" space.
Your solution is brilliant!
Nikki Gladd says
Hi Cathy! Measuring the inside of the drawer, it is less than 20 inches wide. 🙂
Steven R Heggemann says
What is the name of the molding youused and where did you find it? Thanks cant wait to try it.
Nikki Gladd says
Hi Steven! I'm not sure of the name as we built this many years ago. But, we got it at Home Depot if that helps!
Andrea says
really love this idea - but again I can't figure out how to clamp the molding to the bottom of the drawer. Can you help?
Nikki Gladd says
Hi Andrea,
Ben said, if he remembers right, that he used a piece of wood to create a spacer or wedge to hold the molding down and clamp it for the bottom. I'll try to write this in the steps. 🙂 I hope that makes sense!
YerGalVal says
How did you clamp the bottom pieces of molding (bottom of the drawer)?
Nikki Gladd says
Hi YerGalVal,
We used a piece of wood or spacer to hold the molding down while it dried (for the bottom of the drawer). Sorry for the late response! I'm not sure how I missed it!
Louise says
This is a great idea and execution. But I have to ask, why oil based Kilz? I used it for a free-standing cabinet I'd planned to use for a food pantry. I used 2 coats and it took well over two years to get rid of the smell, and that was with keeping the doors open most of the time. Wouldn't latex based have been a better choice? Why did you use oil based Kilz?
Nikki Gladd says
Hi Louise,
I asked Ben this question and here is his answer: "Oil based covers better. For whatever reason, I’ve never had a problem with that primer smelling bad after I painted additional coats."
Alzbeta says
oooo, love it! We only have one and a half tiny drawers in our kitchen (super weird, but, you know, such is the case), so our pots and pans are all stacked up in the cabinet. It's not horrible, but there's still got to be a better to organize my cabinets!
ColleenB. ~ Texas says
what a great and very clever solution to your storage situation.
Great solution for me in doing my utensil drawer. :} Thank you
Great job by the both of you
Nikki says
Thanks, Colleen! I've been thinking about doing this for our utensil drawer, too! Send me pics if you do it! 🙂